Querying Common Data Service (CDS) data in Power Automate can be difficult without prior experience in OData. For citizen developers, at least, that is a fair assumption to make. The Filter Query field in Power Automate utilises an OData structure, so those who are not knowledgeable will have to learn it first.
Luckily, there is a way to get around that roadblock using the Fetch XML Builder. To explain this method, let’s use a scenario.
Let’s say your client wants to generate an automated email list of opportunities that will close in the next 90 days. Let’s also imagine that you have no previous experience in OData, and you don’t have time to go through all the documentations online.
You can skip that step with this method using two different connectors: the original CDS connector and the CDS current environment connector. Let’s begin with the original CDS connector.
Original CDS Connector
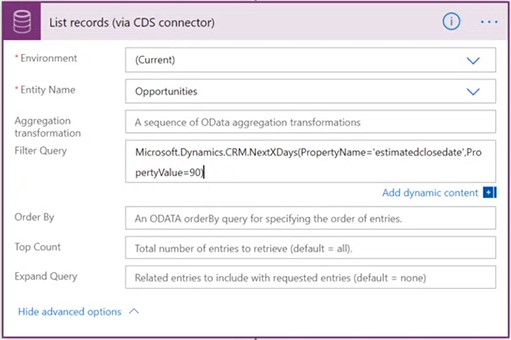
First, set up the trigger to be a recurring flow that is based on a specific schedule for the email. Under List records, go to the Filter Query field which contains OData syntax. Particularly for this type of condition, it is not as straightforward as, say, a test for equality (i.e. fieldname eq X).
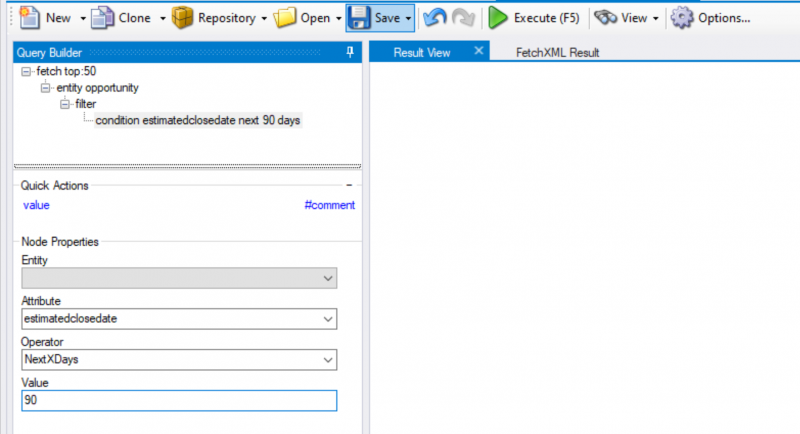
Go to the XRM Toolbox and open the Fetch XML Builder tool to set up a Fetch XML query. The UI is simple and intuitive enough to be able to do that quickly. Under this filter, set up the Attribute, Operator and Value under Node Properties. Take note of the values entered there to get the opportunities that will close in the next 90 days.
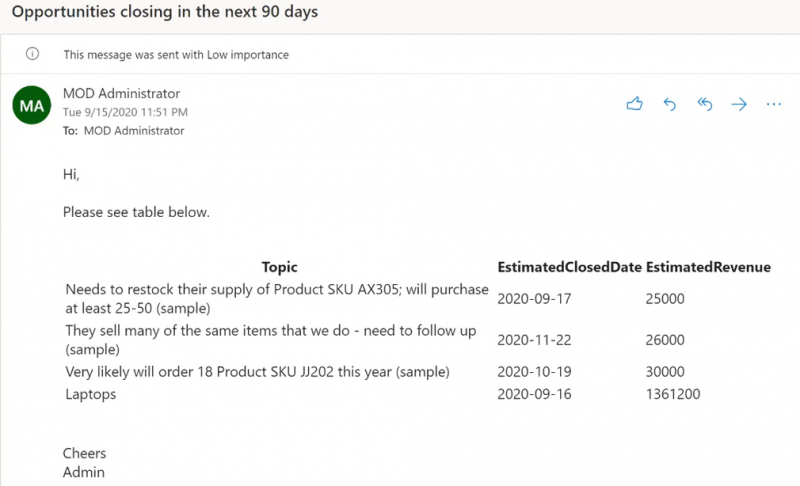
To translate the Fetch XML query, go to View and choose Power Automate Parameters. This will display the query in the format that is compatible with Power Automate. Then, copy and paste it to the Filter query in the Power Automate flow. Here’s the email that the client will receive.
CDS Current Environment
Fortunately, the CDS current environment connector provides a simpler way to querying CDS data in Power Automate. Using the same scenario, let’s start at the Power Automate flow. Setup a flow with a schedule-based trigger. Using the CDS current environment connector, search for the List records action. Here, you already have a field for the Fetch XML Query, so there’s no need for us to be rescued by the Fetch XML builder to translate the query into OData syntax.
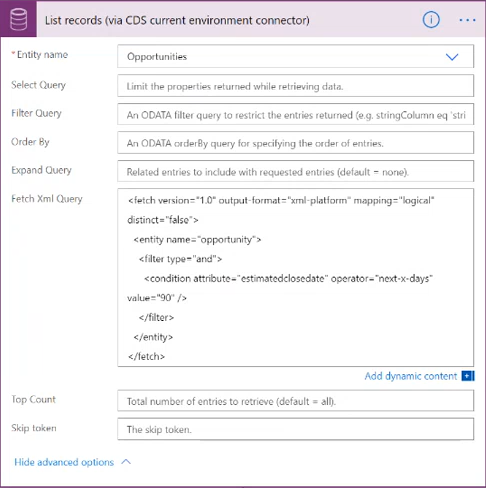
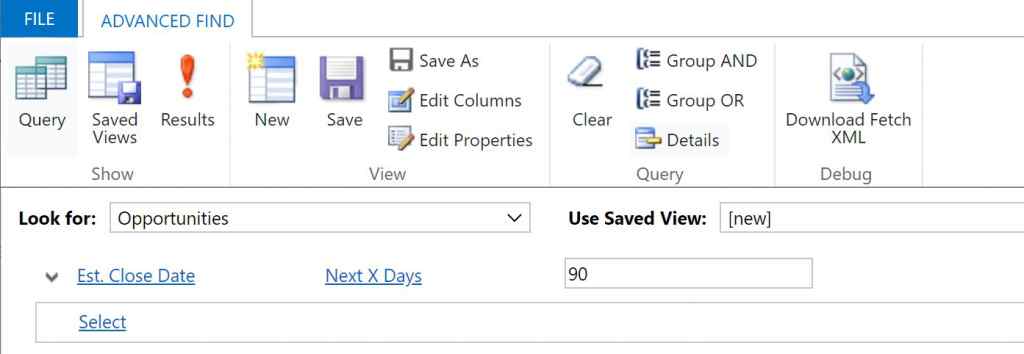
Open Advanced Find to search Opportunities that will be closing in the next 90 days. Then, download the Fetch XML query code. Open the downloaded file using any text editor that you have (e.g. Notepad++). Finally, simply enter that in the flow so the client will receive their desired email. While this method is ideal in collating data about opportunities that will close in a certain time period, it can also be applied in any scenario where you have to query data in CDS. Try it out for yourself and see how much it makes querying CDS data more efficient.
What’s next?
If you enjoyed this trick for Power Automate, you can discover a lot more through our free workshops. We offer various hands-on instructor-led workshops such as App in a Day, Dashboard in a Day and Flow in a Day. Registering for them is easy! You simply have to visit our calendar, check the available dates and choose the workshop you want. If you’re busy on the available dates, you can also watch our recorded webinars. Make sure to follow us on LinkedIn for event updates, Microsoft news, and more.
About the Author: Alfredo Ki Jr.
Alfredo Ki Jr. is a Dynamics 365 Business Analyst at Barhead Solutions. Visit his blog for more Dynamics 365 and Power Platform content.


